teaching

Drill: Fast & Furious 3

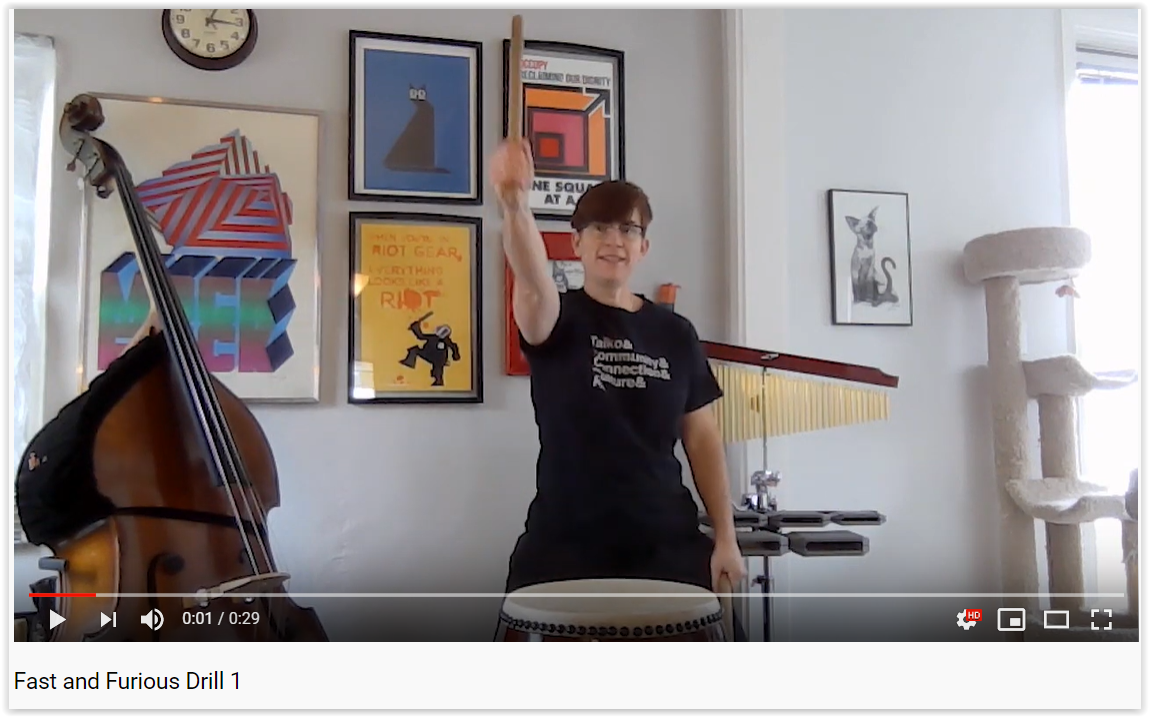
Looking for drills to help folks stay relaxed while playing at speed? Look no further than Kristin’s Fast and Furious series! Fast and Furious 3 (FF3) helps you practice fast hands and timing precision while moving between the kawa and fuchi. (Click these links for posts on FF1, FF2, and FF4.) Here’s FF3 written out in kuchishoka and western notation, and here's a video of our friends at Taiko SOBA demonstrating the drill. Thank you SOBA for the video assist! 

Challenge yourself in FF3 by increasing tempo while staying relaxed. The tempo shifts should happen in the final four “don ka” of each full repetition (see Taiko SOBA’s demo video for an example.) If you’re using this for solo practice, pay attention to your hands, arms, body - even your face! - while you speed up. As soon as you feel yourself tensing up, stop, shake it out, and start again at a tempo where you know you can stay relaxed. Pay attention (as always) to extension, stance, and other kata basics. Many players, especially newer players, speed up by bringing their arms closer into their body or cutting other kata corners. Fight that urge!

For everyone who’s back to in-person practice, add a straight teke teke jiuchi under FF3, as SOBA does in the video. The shime player drives the speed ups. (It’s a great way to practice gradual tempo changes.) The shime player can also be the one who watches people for tension and stops the group when they see it. 

Let us know if you try FF3, and happy teaching!


Activity: Mix it Up!

Whatever ages you’re teaching, you can help your students build confidence with creating rhythms if you scaffold well. I wrote the short poem “My Taiko Teacher” to help the students practice pulse in a 4th/5th grade virtual program I just finished. (The students LOVED the poem - never underestimate the power of making fun of yourself!)

MyTaikoTeacher_FullPoem.png

The poem works great for practicing pulse. You can also use it in the following activity to help students take the first steps in creating their own rhythm patterns:

  • Provide this link to your students (I put it in the chat for my virtual program; if you’re working in person, work with the classroom teacher to see how students can access a computer during your class. Alternately, you could ask the classroom teacher to have students print the slide out and bring it to class with you, and then change beats with markers.)

    • This is a “Make a Copy” link that will prompt students to each make their own copy of the slide that they can then work with. If you’re not familiar with this technique, I highly recommend Katie Wardrobe’s webinar Google Slides for Music Teachers. Actually, I highly recommend Katie Wardrobe, period. I’ve learned SO MUCH listening to her.

  • If your students aren’t familiar with Google Slides, share your screen and show them how to click inside the green boxes and edit the text.

    • For my residency, I didn’t cover ka and kara because the students were all using rolled up towels as their playing surface . This is great for lowering barriers to participation, but not great for ka and kara.

  • Give them a few seconds to change a note, and then have everyone play. If you’ve covered the idea of playing with a jiuchi, then play a ji, but if you haven’t, then play the poem with them without any changes. 

  • Go through this process several more times until they’ve changed 4-8 of the notes.


You probably noticed that the poem makes liberal use of pickup beats. If your students are more advanced, point that out and talk about it. If they aren’t, then just tell them there’s a reason that “My” and “I” are in parentheses and leave it at that. Of course, explain if they ask, but my students didn’t.

Let me know if you try this with any of your students and how it goes. Happy teaching!

Fast and Furious Drill #4

The latest in Kristin’s Fast & Furious series is a fun one! Like all drills in this series, it builds the skill of staying relaxed while playing at speed. FF4 also helps you practice precision timing and finding the pocket. Thanks to our friends Vicky and Ian from Unit Souzou, Taiko SOBA, and Jun Daiko for helping us out with this video demonstration

In the video, Ian demonstrates the drill at 120 bpm and Vicky does it at 240 bpm, and they show how to loop the drill so you’re practicing both hands equally. They’re doing it on a shime, but it translates to other types of drums and practice surfaces. The drill is written out in kuchishoka and western notation here.

Challenge yourself in FF4 by gradually increasing tempo while staying relaxed. Pay attention to your hands, arms, body - even your face! - while you speed up. As soon as you feel yourself tensing up, stop, shake it out, and start again at a tempo where you know you can stay relaxed. There are several metronome apps that will speed up for you automatically. Erin Kelly from Pittsburgh Taiko introduced me to Sound Corset, which is the one I use. Raising the hand that’s playing the “additional” beats will also increase the challenge level.

When you get back to your group practices or your classes, add a straight teke teke jiuchi to FF4 and use that to drive the speed up. (That's a great time for your shime player to practice gradual tempo changes.) The shime player can also be the one who watches people for tension and stops the group when they see it. Let us know if you try this drill!


Content note on the final paragraph of this post: reference to ongoing anti-AAPI violence in the US.

 Finally, we want to recognize that the escalating racism and violence directed towards Asian Americans and Pacific Islanders (AAPI) is making difficult time even harder. As practitioners of an art form rooted in the Japanese-American and Asian-American experience, it is especially important for white members of the taiko community to pause and think about last month’s shootings in Atlanta and the latest wave of anti-AAPI hate crimes in the US. For AAPI folks, thinking about these things probably hasn't been optional lately; white peers, we can't let it be optional for us. We all have a role to play in sending a strong collective message that we will not accept racism, discrimination, hate, and violence in our city, state, and country. We urge everyone in the taiko community to stand up and support Asian American communities. Click here and scroll to the bottom of the linked page for resources to help you educate yourself on speaking up, talking to children, and fighting anti-Asian racism and white supremacy. 


Activity: Fast Find!

Sometimes you need a quick activity to refocus a group, or to build a sense of fun into a new class. This simple activity for kids and playful adults works well on Zoom; I’ve never tried it in a live class (we created it for our virtual classes) but I’m pretty sure it will work there, too. It supports some skill development (focus and beat internalization) but mostly, it’s fun and active and helps students build a playful frame of mind, which is great for learning. And sometimes you just need a brain break!

Click to watch a demo of Fast Find!

Click to watch a demo of Fast Find!

This video shows us doing Fast Find! in one of our recent Kids Taiko Zooms. Start by playing 8 don in unison with the class. Rather than saying the kuchishoka, count the don (say “1 2 3 4 5 6 7 8” rather than “don don don don don don don don”). Play this count several times in a row until everyone has internalized the pulse. (I only do this once in the video because we’ve played the game before, so we only needed a quick review before jumping in.)  Next comes the game. First, say an object (a window, a door, something soft, etc.) then count everyone in. Students play the first note with you. During 2-7 YOU keep playing, saying the numbers out loud, and the students have to find and touch whatever object you’ve named. Their goal is to get back to their drums in time to play the 8th and final don with you. Since Kristin and I teach our online classes together, she plays the game with the students so they have an example to follow.

We usually play 4-5 rounds in our classes. It always gets energy up and puts a smile on people’s faces, which is no small thing in Month 11 of a global pandemic. If you have a particularly genki class, you’ll want to remind them that safety is more important than making getting back to their drums by the 8th don. 

Let me know if you try this game! I’d especially love to hear if you try it in an in-person class. Happy teaching!

RomeRandomBlogGraphics (1).png

Activity: Pop Tarts Ducky Face (Nonsense song)

Nonsense songs are a great way to introduce the concept of syllables corresponding to rhythms, the way they do with kuchishoka. We’ve created several for our kid’s Taiko Zooms, and my favorite is Pop Tarts Ducky Face. It’s good for ages 4 - 8(ish), depending on how you use it. It’s written out here in kuchishoka and western notation, and I demonstrate it twice in the video. First, I show how it works on drums, then I show one way it can be done with body percussion if you and/or your students can’t access instruments. 

To introduce this to 4-6 year olds, the script goes something like this:

Now we’re going to learn a fun new song! Everybody listen. (Do the song) Ok, that was it. Listen again, and pay attention to what I do with my bachi and hands when I say Quack. (Do the song) Did you notice? This next time, do that movement with me. (Do the song, kids copy your movement) Great job! Now, this next time, do that movement with me and say Quack when I say it. (Do the song) Way to go! Okay - this last time, do the Quack with me and also do the Boom! (Do the song) Nice work everybody!

This takes about 2 minutes, which is an attention-span friendly amount of time for these ages. Next class, do it again, and encourage kids to play or clap along, or to say more of the words. You can come back to it for many classes, building on it each time, but don’t spend more than a couple of minutes on it in a class. 

With kids age 7-8, you can spend 5-10 minutes on an activity before it’s time to move on; your first step is to demo the whole thing, then follow the “First me/Now you” method to teach it. Once students have it, play it all together a few times. You can have them rotate between drums in between repetitions if they need more challenge. With especially advanced groups, teach them the body percussion version, and then have them build their own body percussion phrases to go along with the words. 

Kids LOVE this activity, and it works in both virtual and in-person classes. Let me know if you try it - I’d especially love to hear about any modifications you make! - and happy teaching!


Activity: Rolling Hills Drill

RollingHillGraphic.png

Online classes are not an ideal environment for working on kata or ensemble skills. They are, however, a good opportunity to work on musicianship fundamentals. The Rolling Hills Drill helps your students build the ability to keep tempo steady while varying their volume. It’s written out here in kuchishoka and western notation.  

To get the most out of this drill, do it with a metronome. You can use one of many free online metronomes and share your computer sound, or you can use an external metronome (a real one or an app) and set it near your microphone when you lead this drill. Seventy (70) bpm is a beginner-friendly starting tempo. Of course, go faster if you’re working with more advanced players!

You can repeat this drill as many times as you’d like. Rhythmically it’s quite simple, so students can focus on keeping their tempo steady. For more advanced students, challenge them to start the drill with their nondominant hand, and/or extend the crescendo and decrescendo evenly over the entire 8 beats. This is also a great drill for solo practice.

Let me know if you try the Rolling Hills drill and how it works for you. Happy teaching!

Teaching over Zoom: camera angles

Front cam

Front cam

A teacher should make it as easy as possible for their students to learn. This can be tricky in Zoom classes. Chances are your students have a mix of visual processing styles, and you can (and should!) set them up for success by using multiple camera views. Kristin and I use a front cam and a sky cam in our Zoom classes, and recently added a foot cam as well. 

Sky cam

Sky cam

You don’t have to shell out for new webcams to do this. If you host your class meetings on a laptop, use the embedded webcam as your front cam, and your phone as your skycam. (Assuming you have a phone with a camera and wifi.) You’ll need to do a little creative problem solving to set up your skycam, but we’re teaching artists, we eat creative problem solving for breakfast! Kristin and I set ours up  by mounting a tripod cell phone attachment to a lamp extension arm, and then hooking that up to the top of a heavy percussion stand. It wasn’t pretty, but it worked!

Once the phone is in place, you’ll host the meeting on your laptop, and also call in as a participant with the cell phone. When you want to use the skycam, turn off your computer video and sound, mute your computer, unmute the phone, turn on the phone video, and spotlight the phone. Reverse these steps to switch back to the front cam. Leave the phone muted with video off unless you’re sky cam-ing. VERY IMPORTANT: You need to plug headphones into the phone to avoid the echo/feedback issue you get when two devices in the same room are on the same Zoom call.  

If you have some money to invest, buy a webcam and some USB extension cables. Then, put your webcam in your skycam mount and use the cables to connect it to the hosting computer. It’s much easier to switch between cameras when they’re both plugged into the same device (there’s even a keyboard shortcut to do this in Zoom) and you don’t have to do all that unmute/mute business.

Foot cam

Foot cam

We’ve found that people LOVE the sky cam, particularly when we’re introducing new drills and songs. Just this week we added a foot cam for our naname class. This view shows the teacher from chest down, providing a visual reference for foot placement, leg engagement, and koshi integration. I highly recommend adding this view if you’re focusing on kata or introducing a style people aren’t very familiar with.

Drop me a line if you have questions or want to talk through using multiple camera angles in your classes. Happy teaching!


Taiko education as a tool for equity

empty-taiko.png

As taiko players and teachers, we know how profoundly the art form changes people. The personal power, pride, and inner strength that can be found through taiko can fundamentally shift a life path. (I believe this is true of any arts education, but I'm a taiko person, so my focus is there.) 

But have you ever thought about WHO is benefitting from this opportunity for transformation? Overwhelmingly, it’s people with the money to pay for classes, or students who attend schools that can pay for a residency. This perpetuates systems of inequity present throughout the US. I challenge all of us to take a look at who can access our programs. Yes, we all need to make a living - but have you looked at how you might be able to bring in the same revenue by offering your classes on a sliding scale? Have you worked with under-resourced schools to help them obtain grant funding to bring in your program? Do you offer reduced residency rates for Title I schools? (A Title I school is one where 40% or more of the student body qualifies for free or reduced-price lunch.) 

If you’re able to answer yes to any of those questions, take your examination deeper. Do your lessons encourage students to explore and discover, or do they hold you up as the gateway to  specialized knowledge? Do you equip your students to investigate on their own, or do you mold your students to become your disciples? These questions reflect radically different attitudes towards teaching, and the difference between them is the difference between transforming a student life or replicating systems of oppression. 

Taiko education, done well, holds a key to changing our world for the better. Like-minded folks in the taikosphere, please contact me if you want to talk more about this. Let’s be the small, thoughtful group.

Activity: Shaking Up the Apple Tree (PreK-1st)

Since you need to change activities every 5 minutes for PreK-1st graders, you need a lot of activities when teaching these grades. Silver lining: kids this age are generally happy to see activities come up time and again, so you don’t need as much variety from week to week as you do with older students.

I created “Shaking Up the Apple Tree” by adapting an activity from my Orff training. It works in both virtual and in-person classes. It introduces call and answer structure, teaches rhythm steadiness, and even has a math integration! Kristin and I demonstrate it in the video, complete with the short shtick I use to transition from the prior activity. The explanation below is based on having two teachers. If you‘re teaching alone, clap the pulse while you say the rhyme and have the kids join you; then, have them echo your claps in step 3 with clapping instead of drumming. 

1) One teacher says the chant below; the other teacher drums a steady pulse to mark the beat. Everyone stops on “STOP!”

Shaking up the apple tree
Watch the apples drop
To hear the apples falling
You’ve gotta’ STOP!

2) The teacher who said the chant claps 1-8 times. 

3) The other teacher drums that number of beats on the drum; students drum along.

Little kids love this! The “story” stimulates their imaginations, and they get a fun sense of accomplishment from playing the sound of the apples falling. 

Happy teaching!

Activity: Red Light Green Light/ MaruBatsu

In our classes, we typically do a group drumroll to end our warm-up. It’s a great way to transition to skill-focused work, and rolling gives students a chance to focus on relaxation and form. In our kids’ classes, we have two approaches that turn the roll into a game, boosting engagement. They’re both effective in person and in virtual classes. 

Red Light Green light

If you’re not familiar with the children’s game Red Light Green Light, you can find tens of thousands of explanations of it through a Google search. We use a piece of red paper and a piece of green paper. If Kristin holds up the green paper, students roll; when she holds up the red paper, they stop. In Zoom, the paper can also indicate dynamics. If it’s close to the camera, students roll loud; if it’s farther away, they roll quietly. I play along with the 4-5 year olds (they need an example to follow), but not with the 6-7 year olds. 

MaruBatsu

MARU.png

Maru means circle in Japanese, and Batsu means X. It’s relatively common in Japan for someone to hold their arms above their head, fingers touching to make a circle, indicating that something is good or correct. They hold their forearms crossed in front of their bodies in an X to indicate the opposite. For drumrolls, Maru means go and Batsu means stop.


Simple and effective tricks to get your younger students excited about playing a drumroll. Let us know if you try them in your classes, and happy teaching!

Activity: Body percussion: Hand Warmer, Taiko Player, Heart Warmer

Body percussion is a great way to help students maintain rhythm chops in your #taikozoom classes (as many of us have figured out!). This original (?) percussion style exists in folk traditions all over the world: palmas in flamenco, step in American Black culture, folks traditions in south Africa...the list goes on and on. If you want to take a deep dive into your own body percussion training, Antwan Davis is an Oakland-based body percussionist and stepper who has some fun videos on YouTube.

You can do more with body percussion than play your existing rep and drills! Kristin has created a rep of body percussion phrases of various difficulty levels for our classes. Here are 3 that are beginner-friendly and the way we’ve introduced and used them:

  1. Show the phrase name and beats written down on a piece of paper.

  2. Hold that paper up to your webcam and give students a moment to read it. (Your visual learners need this.) For example, we notate Hand Warmer as “slide snapsnap.”

  3. Demo the full phrase 1-2 times SLOWLY, saying whatever you wrote on the paper.

  4. Invite students to join you. 

When you’ve introduced more than one phrase, link them together. For example, Hand Warmer and Taiko Player both fit in the ma (rests) in Heart Warmer. For an extra challenge, add stepping on the beats. (We demo both of those in the video, follow the links in the previous sentence to see.) If you’re lucky enough to be sheltering in place with you co-teacher, you can each choose one pattern and do it several times in a row and have the students choose which of you to follow.

 As the pandemic continues, we hope you’re all doing okay. We’re grateful so many of you are attending our Taiko Zooms - it keeps us connected to our artform and artistic community. If you’re feeling isolated or missing taiko, please join us! If your schedule doesn’t allow you to attend, but you want to build and practice songs and skills, kaDon is an AMAZING resource and you should check them out.

Happy Zooming!

Fast & Furious Drill 2

Drill 2 in Kristin’s Fast & Furious series reinforces the skill of staying relaxed while playing at speed. It also helps you keep practice knowing where the 1 is without having to emphasize that beat. Like Fast & Furious 1, it’s good for group practice and the kind of individual practice that’s the only option for most of us right now.

Notation for the drill is here and the video is here. Approach this drill the same way you did F&F 1: pay attention to your hands, arms, body - and your face- as you gradually pick up your tempo. As soon as you feel yourself tensing up, stop, shake it out, and start again at a tempo where you know you can stay relaxed. In addition, pay attention to the first beat of every measure (hint: it’s always ka or kara) but don’t overemphasize it. This can be tricky for the phrases that start with ka instead of kara!

When you get back to your group practices or classes, add a straight teke teke jiuchi to this and use that to drive the speed up. At that time, the shime player can be the one who watches people for tension. Everyone should pay attention to their own sound and the overall sound of the group to make sure that first beat isn’t overemphasized.

Happy practicing!

Fast & Furious Drill 1

Continuing posts on how to practice taiko under quarantine/shelter-in-place, here’s the first drill in Kristin’s Fast and Furious series! It’s fantastic for individual practice, which is all that’s available to many of us right now. Notation here and video here

The point of this drill is to gradually speed up while staying relaxed. Pay attention to your hands, arms, body - even your face! - while you speed up. As soon as you feel yourself tensing up, stop, shake it out, and start again at a tempo where you know you can stay relaxed. The sticking alternates so that your opposite hand leads each time you repeat the drill, providing even practice with your dominant and non-dominant hands.

When you get back to your group practices or your classes, add a straight teke teke jiuchi to this and use that to drive the speed up. (That's a great time for the shime player to practice gradual tempo changes.) At that time, the shime player can be the one who watches for people tensing up and stops the group when they see it.

Happy practicing!

Activity: “I Play Taiko” Improv Game

Last time I talked about introducing older students to improvisation. I created a new game for the 4th and 5th graders I’m working with now to help them practice their budding improv skills. Most of these students had zero music education prior to my residency, and I followed the steps outlined in this post about teaching improvisation to get them ready for the activity below.

  1. Echo teach the following poem (see video for cadence):

    “I play taiko, you play taiko, we don’t take a rest/I play taiko, you play taiko, put us to the test!

    1  2 3  4 5 6  7 8” 


  2. Have students say the poem. When they get to the 8-count, one student improvises for the first 4 beats. A different student improvises for the second 4 beats.

  3. Repeat until everyone has had a chance to improvise.

As you can see in the video, I had the kids put the drums in a circle, and I kept a simple straight jiuchi the whole time. These students are true beginners so their solos are simple; they are also on beat and the correct length, which is an excellent result for total newbies (go kids!). For intermediate students, pick up the tempo and/or change to a horse ji. You can also extend the 8-count into a 16-count, doubling each improvisation to 8 beats instead of 4, and encourage students to use a wider variety of beats.

Although I did this with kids, playful adults will enjoy it too. I created an extension of this activity for advanced students, and I’ll post about that next time. Until then, happy teaching!

P.S. It was great to see so many of you at HERbeat last weekend! A huge congratulations to Jen Weir for pulling off such an incredible project, and to all of the Taiko All Stars who were in the show. It was a privilege to be in the audience!

Activity: Teaching Improvisation

Improvisation can (and should!) be taught. Kristin created the activity below and I adapted it for my 4th and 5th grade residency this week. The students loved it! It’s a low-pressure way to introduce beginners to the wonderful world of making stuff up. Playing an improv by yourself is a highly exposed - and therefore high-pressure - act. This activity reduces the pressure by having everyone improv at once. Bonus: it also introduces the concept of a musical tag that indicates the beginning/end of an improvised solo.

  1. Have the students play 4 don in unison while you play a straight jiuchi. (Extension: see if they can tell you how many beats that was.)  

  2. Have the students play 4 don in unison, followed by 4 beats of improv (everyone at the same time). Keep the jiuchi going for those 8 beats.

    1. If students have trouble feeling the four, here's a way to build that skill. Alternately, you can count the 4 beats of improv out loud for them.

  3. Have them play several rounds of 4 don/4 beats improv; play a straight jiuchi the whole time.

  4. Stop to debrief. 

    1. For adults, a general “how’s it going?” will usually start a good conversation.

    2. For kids, have them talk in pairs about how it’s going, then choose several kids to share with the class.

  5. Go back to alternating 4 don/4 beats of improv for several more rounds. If students are doing extremely well, change to 8 don and 8 beats of improv.

Written out, it looks something like this:

Improv Exercise Graphic.jpg

This will go best with proper scaffolding. The school where I’m currently working can’t afford an ongoing music program, and very few students come from families that can afford private music lessons. Most kids had zero music education before I started there 3 weeks ago. I scaffolded this over two lessons using our Taiko Tiles and my method for teaching older kids to solo. Kristin and I have also done this in our adult community class and used our Taiko Tiles and Kuchishoka Deck to scaffold. Without that prior experience, this activity can be an exercise in frustration; with it, you have a fun challenge that builds student skill and confidence.

Happy teaching!

Tips for Teaching Stance: Tachi Uchi

Blog_TachiStance_2.1.2020.jpg

Stance isn’t the most exciting element of kata, but it’s the most important. A good stance is fundamental (literally) to everything else a player does, and a good tachi-uchi (aka tate-uchi) stance is fundamental to learning good naname or odaiko stance.

Here are my tips for introducing tachi-uchi stance to beginners.

  1. Explain in broad strokes.

As the teacher, you have a more nuanced understanding of how stance works. Your beginning students aren’t ready for it. Below is what I tell beginners when I teach them horse stance, which is the stance I teach for tachi-uchi. If the stance you’re teaching is different, what you say will be different. No matter what you say, keep it simple. 

  • Place your feet a bit wider than your shoulders.

  • Angle your toes out slightly. Picture standing in the middle of a clock and pointing the toes of your right foot between 1 and 2 and the toes of your left foot between 10 and 11.

    • I encourage taller students to explore a shallow split stance, placing one foot a bit behind them. If you do this, make sure that they keep their hips square to the drum, dropping a foot back without dropping that hip back.

  • Let your knees gently bend, following the angle of your toes. Knees should point slightly out, not directly forward.

  • Let your weight settle into your feet while keeping your legs engaged. Make sure you can plant the front of your foot and lift your heels up off the ground.

  • Picture an electrical current running up the inside of your leg and down the outside. This helps achieve active groundedness in your stance.

That’s it. This takes about 5 minutes, more if I spend individual time with students. (See #3.)

2. Use visual aids, but sparingly.

Totally new players who are struggling with stance will benefit from a visual reference. Provide one with masking tape (bonus: this also introduces a way spikes can mark drum placement for performances). Once a player finds their stance, put a 2-3 inch piece of tape on the floor in front of each big toe. This will help them return to the correct place each time they get into stance. Only do this for the person’s first 3-4 classes, so they don’t become overly dependent on it (textbook scaffolding). 

3. Talk less, play more.

Playing is the only way students can build a body-level understanding of any taiko fundamental. As quickly as you can, move from talking to having them play - songs, drills, games, whatever. Experience is the best teacher. Guide and correct while they’re playing, but give them lots of time to implement.

In the future I’ll share tips on how I teach stance for naname, shime, and odaiko. Happy teaching!

Taiko Games: Call and answer, but evil

Happy New Year, it’s great to be back! First some shout outs: to the inspiring and dedicated groups I worked with in November: Kokyo Taiko, Soten Taiko, Beni Daiko, Ft. Wayne Taiko and Southern Indiana Taiko; to the 200+ folks who took my workshop and the many more I met at the Percussive Arts Society International Conference; and to kaDon, who provided TimbreTaiko and uchiwa clamp setups for PASIC! These were practical and easy to use and you can read more about them here.

A few weeks ago I wrote about the power of Call and Answer to help students get used to improvising. I’ve also talked about how important it is to mix up your activities to keep students engaged. This is true for students of any age! The activity below is afantastic way to challenge students who are already successful at basic call and answer. Originally from my Orff training, I’ve adapted it for taiko.

  1. Play a 4-beat rhythm for students to echo.

  2. While they are echoing the first rhythm, play a second 4-beat rhythm. This is the next pattern the students have to echo.

  3. While students are echoing the second rhythm, play a third, and so on and so on until their heads explode.

The example below shows three full rounds and the beginning of a fourth. 

ComplexCanonGraphic.jpg

This is HARD, for students and teachers alike. In my experience, the first two rounds usually go fine; things go off the rails in Round 3. Start with just 3 rounds, and give students feedback on how they’re doing. As they improve, try more than 3 rounds. It’s really challenging to keep track of how well students are copying one rhythm while you’re playing a new rhythm, but you need to so you can give genuine feedback. (That’s what makes this challenging for teachers.) Let me know how this goes for you, and happy teaching!

Scaffolding: the secret of artful teaching

Scaffolding.jpg

Did you learn to ride a bike with training wheels? To read “cat” before “category?” Then you have experienced scaffolding! It’s the best way to teach ANY new skill, taiko included. If your students are struggling, it’s possible you aren’t properly scaffolding your material.

“Scaffolding” is supporting students while they build skills towards more complex capacities. For example, to learn Matsuri you need basic kuchishoka fluency, the ability to play patterns on beat, a working knowledge of basic kata, and to memorize the patterns. Teaching is most effective when you teach these skills over time, gradually stepping down support as students learn.

Good scaffolding for Matsuri would include exercises that introduce and build skill in kuchishoka (my Drills 1-2 would work, as would countless other drills in the taiko world). You should also include activities that help students learn to feel the beat; the way I teach songs organically incorporates an awareness of pulse and where beats fall. Of course you can’t forget about teaching kata, and you should definitely scaffold naname-uchi by teaching tachi-uchi first. 

Scaffolding is a key factor in artful teaching. Next time you’re planning a class, take a moment to look at the basic skills required to succeed in the class and evaluate if you’ve taught those skills yet. If you haven’t, take a step back and figure out how to scaffold them. It will take you a class or two longer to get to your goal, but your students will achieve much greater mastery over the material.

Feeling stuck? I can help! I’ve been at this for nearly two decades. Drop me a line to set up a consulting session, and happy teaching!

Kuchishoka Tool: Taiko Tiles

Most beginners age 12 and up quickly grasp kuchishoka. Grasping is step one; building fluency comes next. Along with the kuchishoka deck, I use Taiko Tiles to support that development. (Here’s the post on my kuchishoka deck and how to use it in the classroom.)

taiko-tiles-phrases.png

Both of these instructional aids are a huge help to visual learners. The western notation supports students familiar with that system and introduces it to kids who aren’t familiar with it. Having students arrange short patterns with the Tiles and post them on the board for everyone to play is a low-risk introduction to composition. If you’re following my preferred method for teaching new songs, the Taiko Tiles can be a Step 6 (posting them to reinforce what students just learned).  

Here’s a pdf of a basic Tile set. I print them out on colored paper, putting note families on similar colors (don and doko on dark blue and light blue paper, for example) and have them laminated for durability. Masking tape works great for posting, and if you laminate them, they’ll last for several years. (Most print shops can laminate, if you don’t have access to a laminator.)

If you use this resource, let me know! I first worked with these in Tucson, and Kristin and I have fine-honed them in the last few years. I’d love to hear about any further adaptations people come up with. Happy teaching!

Building Blocks for Improvisation: Call and Answer

BlogCallAndAnswer.jpg

Improvisation is a skill that can be scaffolded and taught. (Here’s a great explanation of what scaffolding means in education, for anyone not familiar with the term.) Call and Answer exercises are an excellent way to build this skill. They also build beat vocabulary, form and strike fundamentals, and a student’s musical ear. 

Start off call and answer by playing simple 4-beat phrases and having students echo you. Start with simple phrases, without much ma or syncopation, and gradually work up to more challenging phrases. If you have a small group and/or are working with adults, do this with the drums in a circle, but keep the drums in rows for groups larger than 12 or for kids under 15. Keep this up for a few minutes; it will be engaging to students longer than it’s engaging to you. 

Next, pair students up, and have them choose someone to be A (the other person is B). Count everybody in; all As play a 4-beat phrase at the same time, and all Bs answer at the same time. Give them a “So-re” to reset and then all Bs play a phrase at the same time and all As answer at the same time. Do several rounds of this. If they get good at it, take out the “So-re” and just have them trade call and answer patterns continuously.

This gets tricky, because students really have to focus to hear the pattern their partner is playing. The advantage is that everyone is playing at the same time, so students feel quite safe in playing an improvised 4 beat pattern.

Finally, go back to large group call and answer, but this time, have students call instead of you. One student calls, everyone answers; the next student calls, everyone answers; and so on. If you have a small group and/or adults, do this in a circle. If you’re working with a group that doesn’t do well in a circle, keep them in rows and pass the call up and down the rows.

You can do these exercises in a row, or one each class, or repeat them all regularly. If you use them, let me know. Happy teaching!