teaching artist

Activity: Videos and See, Think, Wonder

STWBlogPic.png

I’m doing a 4-week residency at a STEAM Summer School right now, working with 7th graders for 2 hours every weekday. Most of them hadn’t seen much taiko, so we’ve been watching videos to build familiarity with and reduce the (intimidating) mystery around taiko performance. Don’t underestimate the power of this kind of referencing! It’s also been helpful because this age just can’t spend 2 hours in a row on the drum, so I’ve needed lots of other activities to support their learning.

I’m teaching Matsuri Daiko, so I’ve included several videos of that song. For convenience, here are the videos I’ve show:

Soh Daiko (s/o to Tamiko and some great MC’ing)

Senryu Taiko (this one’s great because the song structure is relatively simple, so my students could pick out the body easily)

World Music Students, San Francisco School for the Arts (this one’s great because the performers aren’t much older than the kids I’m working with now)

(I’m open to suggestions, please let me know if you know of other versions I should show!)

I’m using Harvard Project Zero’s See Think Wonder to help my students to engage more deeply with the videos. See, Think, Wonder requires multiple viewings of the video. For longer videos, I show the whole thing during step 1, but only an excerpt for steps 2 and 3. Here’s how it works.

  1. Show the video. While students watch, they write down things they see. They only write down what they can directly observe. For example, “I see people with smiles on their faces” rather than “I see happy people.”

  2. Show the video again. This time, students write down what they think about what they’ve observed. For example, “I think the people performing are happy.”

  3. Show the video a third time, and this time, students write down what they wonder. For example, “I wonder how long it took them to learn this song.”

This routine is a great way to promote thoughtful engagement and I highly recommend it. It’s been cool to watch my students progress from “I wonder how long it took them to learn this song” to “I wonder how they decided who would play their solo first.”  It’s textbook arts integration (literally) and can be applied to almost any subject, arts or academic. Let me know if you try it, and happy teaching

Activity: Mix it Up!

Whatever ages you’re teaching, you can help your students build confidence with creating rhythms if you scaffold well. I wrote the short poem “My Taiko Teacher” to help the students practice pulse in a 4th/5th grade virtual program I just finished. (The students LOVED the poem - never underestimate the power of making fun of yourself!)

MyTaikoTeacher_FullPoem.png

The poem works great for practicing pulse. You can also use it in the following activity to help students take the first steps in creating their own rhythm patterns:

  • Provide this link to your students (I put it in the chat for my virtual program; if you’re working in person, work with the classroom teacher to see how students can access a computer during your class. Alternately, you could ask the classroom teacher to have students print the slide out and bring it to class with you, and then change beats with markers.)

    • This is a “Make a Copy” link that will prompt students to each make their own copy of the slide that they can then work with. If you’re not familiar with this technique, I highly recommend Katie Wardrobe’s webinar Google Slides for Music Teachers. Actually, I highly recommend Katie Wardrobe, period. I’ve learned SO MUCH listening to her.

  • If your students aren’t familiar with Google Slides, share your screen and show them how to click inside the green boxes and edit the text.

    • For my residency, I didn’t cover ka and kara because the students were all using rolled up towels as their playing surface . This is great for lowering barriers to participation, but not great for ka and kara.

  • Give them a few seconds to change a note, and then have everyone play. If you’ve covered the idea of playing with a jiuchi, then play a ji, but if you haven’t, then play the poem with them without any changes. 

  • Go through this process several more times until they’ve changed 4-8 of the notes.


You probably noticed that the poem makes liberal use of pickup beats. If your students are more advanced, point that out and talk about it. If they aren’t, then just tell them there’s a reason that “My” and “I” are in parentheses and leave it at that. Of course, explain if they ask, but my students didn’t.

Let me know if you try this with any of your students and how it goes. Happy teaching!

Activity: Fast Find!

Sometimes you need a quick activity to refocus a group, or to build a sense of fun into a new class. This simple activity for kids and playful adults works well on Zoom; I’ve never tried it in a live class (we created it for our virtual classes) but I’m pretty sure it will work there, too. It supports some skill development (focus and beat internalization) but mostly, it’s fun and active and helps students build a playful frame of mind, which is great for learning. And sometimes you just need a brain break!

Click to watch a demo of Fast Find!

Click to watch a demo of Fast Find!

This video shows us doing Fast Find! in one of our recent Kids Taiko Zooms. Start by playing 8 don in unison with the class. Rather than saying the kuchishoka, count the don (say “1 2 3 4 5 6 7 8” rather than “don don don don don don don don”). Play this count several times in a row until everyone has internalized the pulse. (I only do this once in the video because we’ve played the game before, so we only needed a quick review before jumping in.)  Next comes the game. First, say an object (a window, a door, something soft, etc.) then count everyone in. Students play the first note with you. During 2-7 YOU keep playing, saying the numbers out loud, and the students have to find and touch whatever object you’ve named. Their goal is to get back to their drums in time to play the 8th and final don with you. Since Kristin and I teach our online classes together, she plays the game with the students so they have an example to follow.

We usually play 4-5 rounds in our classes. It always gets energy up and puts a smile on people’s faces, which is no small thing in Month 11 of a global pandemic. If you have a particularly genki class, you’ll want to remind them that safety is more important than making getting back to their drums by the 8th don. 

Let me know if you try this game! I’d especially love to hear if you try it in an in-person class. Happy teaching!

RomeRandomBlogGraphics (1).png

Activity: Pop Tarts Ducky Face (Nonsense song)

Nonsense songs are a great way to introduce the concept of syllables corresponding to rhythms, the way they do with kuchishoka. We’ve created several for our kid’s Taiko Zooms, and my favorite is Pop Tarts Ducky Face. It’s good for ages 4 - 8(ish), depending on how you use it. It’s written out here in kuchishoka and western notation, and I demonstrate it twice in the video. First, I show how it works on drums, then I show one way it can be done with body percussion if you and/or your students can’t access instruments. 

To introduce this to 4-6 year olds, the script goes something like this:

Now we’re going to learn a fun new song! Everybody listen. (Do the song) Ok, that was it. Listen again, and pay attention to what I do with my bachi and hands when I say Quack. (Do the song) Did you notice? This next time, do that movement with me. (Do the song, kids copy your movement) Great job! Now, this next time, do that movement with me and say Quack when I say it. (Do the song) Way to go! Okay - this last time, do the Quack with me and also do the Boom! (Do the song) Nice work everybody!

This takes about 2 minutes, which is an attention-span friendly amount of time for these ages. Next class, do it again, and encourage kids to play or clap along, or to say more of the words. You can come back to it for many classes, building on it each time, but don’t spend more than a couple of minutes on it in a class. 

With kids age 7-8, you can spend 5-10 minutes on an activity before it’s time to move on; your first step is to demo the whole thing, then follow the “First me/Now you” method to teach it. Once students have it, play it all together a few times. You can have them rotate between drums in between repetitions if they need more challenge. With especially advanced groups, teach them the body percussion version, and then have them build their own body percussion phrases to go along with the words. 

Kids LOVE this activity, and it works in both virtual and in-person classes. Let me know if you try it - I’d especially love to hear about any modifications you make! - and happy teaching!


Activity: Using poems to teach pulse to kids (and playful adults)

We’re not all born with a strong sense of rhythm. This critical taiko fundamental can be developed at any age. This activity below helps kids age 7-11 (and young-at-heart adults) build their sense of rhythm, and it works well in person and over Zoom. It’s a little too goofy for middle and high school students. Next time, I’ll post the version I use with that age group. 

You want to do this with a poem that has a strong rhythm and opportunity for playful voicing. I first heard the Coyote Poem in the video in my Orff training and have used it ever since. Teach it through echo teaching, tapping the pulse on your body the whole time (as I do in the video). Once students have it, lead them through saying the poem silently to themselves, only voicing the whoops. This is challenging and very, very fun. If you’re teaching over Zoom, have students throw their arms up in the air when they say the “whoops” so you have visual confirmation (assuming you have them muted during class). 

In Zoom classes, your next step is to teach a movement sequence for students to follow while saying the poem. I demonstrate one in the video, but you can make up your own. Work towards students doing the movement sequence while voicing only the whoops. If you’re working with slightly older students (3rd and 4th grade), once they succeed with the movement sequence you created, put them into breakout rooms of 2-3 to create their own and share out when everyone comes back together. 

For in-person classes, rather than teaching a movement sequence, give each student a tennis ball. Put students into groups of 4; have each group sit in a circle and say the poem while passing their tennis balls on the pulse. Once they can do this, have them pass the tennis balls while saying the poem silently voicing only the whoops. Hilarity ensues, and so does learning! I’ve learned the hard way to be clear about expectations with the tennis balls before passing them out (i.e., if you don’t want kids to throw them at each other, or roll them across the floor, lay that out at the start, along with any consequences you have.) 

Teaching is hard right now, if you’re fortunate enough to have teaching work at all. I hope this activity brings you and your students some lightness and some learning. Let me know if you have questions or if you try it!

Taiko education as a tool for equity

empty-taiko.png

As taiko players and teachers, we know how profoundly the art form changes people. The personal power, pride, and inner strength that can be found through taiko can fundamentally shift a life path. (I believe this is true of any arts education, but I'm a taiko person, so my focus is there.) 

But have you ever thought about WHO is benefitting from this opportunity for transformation? Overwhelmingly, it’s people with the money to pay for classes, or students who attend schools that can pay for a residency. This perpetuates systems of inequity present throughout the US. I challenge all of us to take a look at who can access our programs. Yes, we all need to make a living - but have you looked at how you might be able to bring in the same revenue by offering your classes on a sliding scale? Have you worked with under-resourced schools to help them obtain grant funding to bring in your program? Do you offer reduced residency rates for Title I schools? (A Title I school is one where 40% or more of the student body qualifies for free or reduced-price lunch.) 

If you’re able to answer yes to any of those questions, take your examination deeper. Do your lessons encourage students to explore and discover, or do they hold you up as the gateway to  specialized knowledge? Do you equip your students to investigate on their own, or do you mold your students to become your disciples? These questions reflect radically different attitudes towards teaching, and the difference between them is the difference between transforming a student life or replicating systems of oppression. 

Taiko education, done well, holds a key to changing our world for the better. Like-minded folks in the taikosphere, please contact me if you want to talk more about this. Let’s be the small, thoughtful group.

Activity: Body percussion: Hand Warmer, Taiko Player, Heart Warmer

Body percussion is a great way to help students maintain rhythm chops in your #taikozoom classes (as many of us have figured out!). This original (?) percussion style exists in folk traditions all over the world: palmas in flamenco, step in American Black culture, folks traditions in south Africa...the list goes on and on. If you want to take a deep dive into your own body percussion training, Antwan Davis is an Oakland-based body percussionist and stepper who has some fun videos on YouTube.

You can do more with body percussion than play your existing rep and drills! Kristin has created a rep of body percussion phrases of various difficulty levels for our classes. Here are 3 that are beginner-friendly and the way we’ve introduced and used them:

  1. Show the phrase name and beats written down on a piece of paper.

  2. Hold that paper up to your webcam and give students a moment to read it. (Your visual learners need this.) For example, we notate Hand Warmer as “slide snapsnap.”

  3. Demo the full phrase 1-2 times SLOWLY, saying whatever you wrote on the paper.

  4. Invite students to join you. 

When you’ve introduced more than one phrase, link them together. For example, Hand Warmer and Taiko Player both fit in the ma (rests) in Heart Warmer. For an extra challenge, add stepping on the beats. (We demo both of those in the video, follow the links in the previous sentence to see.) If you’re lucky enough to be sheltering in place with you co-teacher, you can each choose one pattern and do it several times in a row and have the students choose which of you to follow.

 As the pandemic continues, we hope you’re all doing okay. We’re grateful so many of you are attending our Taiko Zooms - it keeps us connected to our artform and artistic community. If you’re feeling isolated or missing taiko, please join us! If your schedule doesn’t allow you to attend, but you want to build and practice songs and skills, kaDon is an AMAZING resource and you should check them out.

Happy Zooming!

Activity: “I Play Taiko” Improv Game

Last time I talked about introducing older students to improvisation. I created a new game for the 4th and 5th graders I’m working with now to help them practice their budding improv skills. Most of these students had zero music education prior to my residency, and I followed the steps outlined in this post about teaching improvisation to get them ready for the activity below.

  1. Echo teach the following poem (see video for cadence):

    “I play taiko, you play taiko, we don’t take a rest/I play taiko, you play taiko, put us to the test!

    1  2 3  4 5 6  7 8” 


  2. Have students say the poem. When they get to the 8-count, one student improvises for the first 4 beats. A different student improvises for the second 4 beats.

  3. Repeat until everyone has had a chance to improvise.

As you can see in the video, I had the kids put the drums in a circle, and I kept a simple straight jiuchi the whole time. These students are true beginners so their solos are simple; they are also on beat and the correct length, which is an excellent result for total newbies (go kids!). For intermediate students, pick up the tempo and/or change to a horse ji. You can also extend the 8-count into a 16-count, doubling each improvisation to 8 beats instead of 4, and encourage students to use a wider variety of beats.

Although I did this with kids, playful adults will enjoy it too. I created an extension of this activity for advanced students, and I’ll post about that next time. Until then, happy teaching!

P.S. It was great to see so many of you at HERbeat last weekend! A huge congratulations to Jen Weir for pulling off such an incredible project, and to all of the Taiko All Stars who were in the show. It was a privilege to be in the audience!

Activity: Teaching Improvisation

Improvisation can (and should!) be taught. Kristin created the activity below and I adapted it for my 4th and 5th grade residency this week. The students loved it! It’s a low-pressure way to introduce beginners to the wonderful world of making stuff up. Playing an improv by yourself is a highly exposed - and therefore high-pressure - act. This activity reduces the pressure by having everyone improv at once. Bonus: it also introduces the concept of a musical tag that indicates the beginning/end of an improvised solo.

  1. Have the students play 4 don in unison while you play a straight jiuchi. (Extension: see if they can tell you how many beats that was.)  

  2. Have the students play 4 don in unison, followed by 4 beats of improv (everyone at the same time). Keep the jiuchi going for those 8 beats.

    1. If students have trouble feeling the four, here's a way to build that skill. Alternately, you can count the 4 beats of improv out loud for them.

  3. Have them play several rounds of 4 don/4 beats improv; play a straight jiuchi the whole time.

  4. Stop to debrief. 

    1. For adults, a general “how’s it going?” will usually start a good conversation.

    2. For kids, have them talk in pairs about how it’s going, then choose several kids to share with the class.

  5. Go back to alternating 4 don/4 beats of improv for several more rounds. If students are doing extremely well, change to 8 don and 8 beats of improv.

Written out, it looks something like this:

Improv Exercise Graphic.jpg

This will go best with proper scaffolding. The school where I’m currently working can’t afford an ongoing music program, and very few students come from families that can afford private music lessons. Most kids had zero music education before I started there 3 weeks ago. I scaffolded this over two lessons using our Taiko Tiles and my method for teaching older kids to solo. Kristin and I have also done this in our adult community class and used our Taiko Tiles and Kuchishoka Deck to scaffold. Without that prior experience, this activity can be an exercise in frustration; with it, you have a fun challenge that builds student skill and confidence.

Happy teaching!

Tips for Teaching Stance: Tachi Uchi

Blog_TachiStance_2.1.2020.jpg

Stance isn’t the most exciting element of kata, but it’s the most important. A good stance is fundamental (literally) to everything else a player does, and a good tachi-uchi (aka tate-uchi) stance is fundamental to learning good naname or odaiko stance.

Here are my tips for introducing tachi-uchi stance to beginners.

  1. Explain in broad strokes.

As the teacher, you have a more nuanced understanding of how stance works. Your beginning students aren’t ready for it. Below is what I tell beginners when I teach them horse stance, which is the stance I teach for tachi-uchi. If the stance you’re teaching is different, what you say will be different. No matter what you say, keep it simple. 

  • Place your feet a bit wider than your shoulders.

  • Angle your toes out slightly. Picture standing in the middle of a clock and pointing the toes of your right foot between 1 and 2 and the toes of your left foot between 10 and 11.

    • I encourage taller students to explore a shallow split stance, placing one foot a bit behind them. If you do this, make sure that they keep their hips square to the drum, dropping a foot back without dropping that hip back.

  • Let your knees gently bend, following the angle of your toes. Knees should point slightly out, not directly forward.

  • Let your weight settle into your feet while keeping your legs engaged. Make sure you can plant the front of your foot and lift your heels up off the ground.

  • Picture an electrical current running up the inside of your leg and down the outside. This helps achieve active groundedness in your stance.

That’s it. This takes about 5 minutes, more if I spend individual time with students. (See #3.)

2. Use visual aids, but sparingly.

Totally new players who are struggling with stance will benefit from a visual reference. Provide one with masking tape (bonus: this also introduces a way spikes can mark drum placement for performances). Once a player finds their stance, put a 2-3 inch piece of tape on the floor in front of each big toe. This will help them return to the correct place each time they get into stance. Only do this for the person’s first 3-4 classes, so they don’t become overly dependent on it (textbook scaffolding). 

3. Talk less, play more.

Playing is the only way students can build a body-level understanding of any taiko fundamental. As quickly as you can, move from talking to having them play - songs, drills, games, whatever. Experience is the best teacher. Guide and correct while they’re playing, but give them lots of time to implement.

In the future I’ll share tips on how I teach stance for naname, shime, and odaiko. Happy teaching!

Scaffolding: the secret of artful teaching

Scaffolding.jpg

Did you learn to ride a bike with training wheels? To read “cat” before “category?” Then you have experienced scaffolding! It’s the best way to teach ANY new skill, taiko included. If your students are struggling, it’s possible you aren’t properly scaffolding your material.

“Scaffolding” is supporting students while they build skills towards more complex capacities. For example, to learn Matsuri you need basic kuchishoka fluency, the ability to play patterns on beat, a working knowledge of basic kata, and to memorize the patterns. Teaching is most effective when you teach these skills over time, gradually stepping down support as students learn.

Good scaffolding for Matsuri would include exercises that introduce and build skill in kuchishoka (my Drills 1-2 would work, as would countless other drills in the taiko world). You should also include activities that help students learn to feel the beat; the way I teach songs organically incorporates an awareness of pulse and where beats fall. Of course you can’t forget about teaching kata, and you should definitely scaffold naname-uchi by teaching tachi-uchi first. 

Scaffolding is a key factor in artful teaching. Next time you’re planning a class, take a moment to look at the basic skills required to succeed in the class and evaluate if you’ve taught those skills yet. If you haven’t, take a step back and figure out how to scaffold them. It will take you a class or two longer to get to your goal, but your students will achieve much greater mastery over the material.

Feeling stuck? I can help! I’ve been at this for nearly two decades. Drop me a line to set up a consulting session, and happy teaching!

Building Blocks for Improvisation: Call and Answer

BlogCallAndAnswer.jpg

Improvisation is a skill that can be scaffolded and taught. (Here’s a great explanation of what scaffolding means in education, for anyone not familiar with the term.) Call and Answer exercises are an excellent way to build this skill. They also build beat vocabulary, form and strike fundamentals, and a student’s musical ear. 

Start off call and answer by playing simple 4-beat phrases and having students echo you. Start with simple phrases, without much ma or syncopation, and gradually work up to more challenging phrases. If you have a small group and/or are working with adults, do this with the drums in a circle, but keep the drums in rows for groups larger than 12 or for kids under 15. Keep this up for a few minutes; it will be engaging to students longer than it’s engaging to you. 

Next, pair students up, and have them choose someone to be A (the other person is B). Count everybody in; all As play a 4-beat phrase at the same time, and all Bs answer at the same time. Give them a “So-re” to reset and then all Bs play a phrase at the same time and all As answer at the same time. Do several rounds of this. If they get good at it, take out the “So-re” and just have them trade call and answer patterns continuously.

This gets tricky, because students really have to focus to hear the pattern their partner is playing. The advantage is that everyone is playing at the same time, so students feel quite safe in playing an improvised 4 beat pattern.

Finally, go back to large group call and answer, but this time, have students call instead of you. One student calls, everyone answers; the next student calls, everyone answers; and so on. If you have a small group and/or adults, do this in a circle. If you’re working with a group that doesn’t do well in a circle, keep them in rows and pass the call up and down the rows.

You can do these exercises in a row, or one each class, or repeat them all regularly. If you use them, let me know. Happy teaching!


Taiko Game: Hey hey, look at me (K-3)

Goofing around is integral to learning improvisation. A kid (or adult) who’s goofing around, making funny faces, talking in a silly voice, is learning to take risks and trust their creative instincts; with just a little bit of structure, goofing around becomes a precise educational tool.

“Hey Hey, Look at Me,” a game from my Orff training, is structured goofing around at its finest. Here’s how it works. 

1. Echo teach this song (see video for tune, or invent your own):

Hey hey, look at me

Make yourself look just like me.

2. Arrange students in 2 rows facing each other. Designate one row as #1 and the other as #2. Have row #2 turn their backs to row #1.

3. Have all students sing the song. When they finish, clap twice. At the first clap, students in row #1 strike a pose. At the second clap, students in row #2 turn around to face their partner and copy them. 

4. Repeat with row #2 striking the pose and row #1 copying. 

K-3 students LOVE this game. In the video, I’m keeping the pulse of the song with rhythm sticks, and giving the Pose/Copy cues in time with that pulse. This is slightly more advanced. Introduce the game as described above and work your way up to how I’m doing it in the video.

Bonus: once kids have learned it, this works great as an attention-getter. All you have to do is sing the first few notes and all eyes in the room will be glued to you. 

High school students and adults have fun with this game as well. The only age where it doesn’t work is pre-teen and early teen. It’s far too goofy for that age. In the future I’ll share activities that work better for those ages. Happy teaching!

Taiko Camp Part 3: Tanko Bushi & Putting it all together

2019CampTeaching_1.jpg

Having a unifying concept makes an educational program cohesive. For my taiko camp, I chose Obon as the unifying concept because of the time of year (summer camp, summer festival), the ties between obon and taiko, and the cultural significance of the holiday both in Japan and in Japanese American communities in the US. 

That unifying concept pulled together learning taiko, making a papier-maché chochin, learning Tanko Bushi, and holding a mini-Obon on the final day. If you don’t know Tanko Bushi, a Google search will yield thousands of videos from which you can learn it. You should know the context of the song/dance before teaching it, and the Wikipedia entry on Tanko Bushi is pretty comprehensive. The best part about this dance is that it’s simple, so kids can easily build enough mastery to teach the dance at their mini-Obon, giving them a strong sense of accomplishment and pride. 

My Taiko Camp: Full Curriculum lays out exactly how I fit the Chochin, Matsuri, and Tanko Bushi activities together day-by-day. It’s a step-by-step guide to leading your first taiko camp. If you use it, I’d love to hear about it. Happy teaching camping!

Taiko Camp Part 1: Overview, and how to make a papier-maché chochin

Chochin Cover Pic.jpg

Once you’re established as a teaching artist, summer camp bookings will probably come your way. Summer camps are a great place to introduce kids to taiko! The camp format allows you to cover everything from taiko basics to taiko history (i.e., the way Internment of Japanese Americans during WWII relates to the development of taiko in the US).

I just finished a one week camp that lasted 3 hours a day for 5 consecutive days. I chose Obon as the central theme, with the campers hosting a mini-Obon on the last day. I covered 3 main activities during the camp: learning Matsuri (including solos), learning Tanko Bushi well enough to be able to teach it, and making a papier-maché chochin. We worked on each activity every day. 

Chochin are paper lanterns; at Obon, they’re often hung as decoration. The strings of chochin swaying above everyone’s heads at odori is one of my favorite sights at San Jose Obon. Here’s my step-by-step guide to making a papier maché chochin; it includes how I broke down the process so my campers did a little bit each day. 

In my next few posts, I’ll share the rest of my camp curriculum so you can take advantage of these opportunities when they arise for you. Happy teaching camping!

Teaching Beginners to Solo: Wipe Out!

You should always have more than one activity for skills you’re helping students build. A few weeks ago I wrote about teaching adults to solo using the kuchishoka deck.

Wipe Out Easy.jpg

Wipe Out! is another great activity that 1) reduces the intimidation factor around soloing 2) shows how powerful ma can be and 3) builds a feel for an 8-beat phrase. Don’t let the fact that it’s a game make you think it’s only for kids! Although I originally created it for kids, I’ve done it with kids and adults and it’s always a hit.

Here’s how Wipe Out! works. You’ll need a white board.

  1. Write the numbers 1-8 on the board.

  2. Have the students choose straight ji or swing ji and start that ji on the shime. (For true beginners, just go with straight ji.)

  3. Count the students in and have them play 8 don, one for every number on the board.

  4. Erase a number from the board.

  5. Count the students in and have them play 7 don and 1 su, placing the su on whatever number you wiped out.

    • For example; if you erased the 5, they’d play: don don don don su don don don.

  6. Repeat steps 4-5 as many times as you want.

Wipe Out Variation.jpg

As people get more comfortable, challenge them by inviting a student to come up and do the wiping out, or by eliminating the pause/count in between the wiping out and playing the revised phrase, or by letting them change a number to ka by underlining instead of wiping out, or to doko by underlining twice (seen in the photo on the left).

It’s a little silly, it’s a lot of fun, it’s challenging but not impossible, and all of that generates an learning environment where students are more willing and able to take risks (like soloing!). Have fun with it, and happy teaching!


Landing your first residency

TullyTeach.jpg

In-school residencies can be a welcome source of revenue for a group or an individual teaching artist. Like any line of work, it can be hard to break into, but once you do, it becomes easier to get more of it. Here are some tips:

  1. Develop a one-pager.

    This doc should explain how your program will benefit the students and the school receiving the residency. Keep it to one page and make sure there’s lots of “air” on the page. Bulleted lists and 2-3 paragraphs with spaces in between them are good; a solid wall of text is not. The Americans for the Arts has a TON of research on the benefits of arts education and is a good starting point. This one-pager should guide the conversation in meetings with teachers and principals, and you should leave a copy with them at the end of the meeting.


  2. Leverage your existing network.

    When I was a taiko newbie, my group performed at an elementary school where a member’s granddaughter was a student. Her teacher LOVED the performance. The following year, I approached that teacher about a residency and she was immediately an advocate. She convinced the rest of the teachers at her grade level and the principal, and we did a residency there the following year.

    I landed my first residency after moving to the Bay Area when a taiko friend mentioned that another friend had just passed on a residency. The first friend connected me with the person booking the residency and they booked me right away because I came to them through a recommendation.

    The lesson here: be social. Make friends. Hang out with them. Go to events. Let people in your orbit know you’re looking for residency work.


  3. Find your own funding.

    Schools rarely have the money to fully fund an artist-in-residence program. Many states have a statewide arts agency that offers partial grants to help cover the cost, but schools don’t always know about this resource. Do your research beforehand, and bring at least one grant opportunity to the school to help cover your fee. Some states require that the school be the applicant, so it’s very helpful to the school if you can provide grant language they’ll need to put together a proposal.


  4. Residencies attract more residencies.

    Just like performances attract more performances, completing even one successful residency is a strong indicator that more will come your way. Kids talk to parents, parents talk to neighbors and co-workers, teachers talk to peers at other schools. This word of mouth is likely to bring you more work.


Don’t give up if it takes months or even a year or two to land your first residency - more will almost certainly follow. Of course, the stronger your program, the easier it will be to find additional work. I can help - contact me for support in creating a great in-school residency. Happy teaching!


Questions a taiko teacher should ask

blog 10q.jpg

If you’ll be teaching more than one session in a school, you’ll probably have a planning meeting with the teachers you’ll be working with. The principal may attend too. Below are 11 questions you should definitely ask. These aren’t necessarily in order of importance, so ask them all! The answers will help you successfully launch your classes.

1. How big is the room where I’ll be teaching? What else is this room used for?

You want to make sure they’re not putting you in an unused classroom that’s full of desks. If it’s a room that’s used for other activities, you want to make sure your drums will be safe when you’re not there. Ask if you can see the room after the meeting ends.

2. Are there any adjacent classrooms?

If a school plans to put you in a room with an adjacent classroom, make sure they understand how loud taiko can be.

3. Is there secure storage? Can I see it?

Note, secure doesn’t HAVE to mean locked. In many schools, the stage in the cafeteria is a very low-traffic area and a safe place to store drums.

4. What time does the school day start and end?

Most school parking lots are bedlam during drop-off and pick-up (about 10 minutes before and after beginning and end of the school day). Do yourself a favor by avoiding these times.

5. Are there English Language Learners in the classes?

As taiko teachers, we’re lucky that kids can succeed in our classes without understanding every single word we say. Still, I find it’s helpful to know if there are a lot of ELL students so I can be sure to physically demonstrate a lot and talk as little as possible.

6. Are there special needs students in the classes? If so, what accommodations do they need?

Make sure you can provide these accommodations and be up front if you can’t. It’s a good idea for students with sound sensitivities to wear their headphones to class.

7. How many students are there in each class?

I’ve had 23-32 students in a class, which translates to enormously different equipment and space needs.

8. How much in-school music instruction have the students had before now?

I’ve had answers ranging from “none” to “multiple years,” which greatly affects my lesson planning.

9. Will the classroom teachers be staying in the room with me and their students? If so, will they be participating?

If you’re not certified, the classroom teacher will usually stay in the room with you, but not always. Even if they stay in the room, they may take advantage of the opportunity to catch up with grading or other tasks. It’s important to know the school’s expectation is of their teachers.

10. Are any of the following scheduled during the residency: fire drills, field trips, assemblies, or other special programs that might affect the schedule?

Schools schedule these kinds of things months in advance, but often don’t think to mention them to a teaching artist. It’s up to you to ask!

11. Do you have a method you use in your classroom for student participation or behavior?

Some teachers use popsicle sticks with student names on them to promote participation, or marbles in a jar as a behavior incentive, or other classroom management techniques. It’s useful to know these beforehand so you can fold them into your classroom management. (See this post for more detail.)

If you have questions or need advice on planning a successful taiko education program, drop me a line. I can help. Happy teaching!

10 practical tips for taiko teaching artists

DSCF0001.JPG

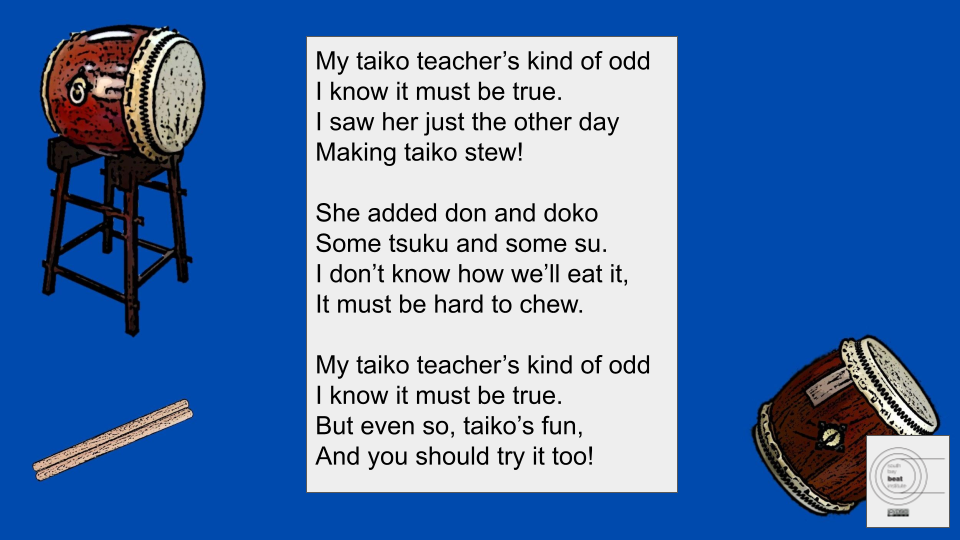
Taiko teaching artist is the best job I’ve ever had. It’s also the hardest job I’ve ever had. Here are 10 things I’ve learned over the years that make teaching taiko in schools easier.

  1. Make friends with the Office Manager and Custodian.

These folks have difficult and under-appreciated jobs. At the same time, they can be highly influential on your residency’s success. An office manager who feels valued by you will call teachers who haven’t shown up for class, or make an announcement to remind teachers to bring whiteboards. A custodian who feels valued will make sure students don’t mess with your drums when you’re on break. They are critical allies. Learn their names. Smile at them. Thank them. Give them a Starbucks gift card. It will make your life easier. (Depending on your school, the office manager may also be called the secretary or receptionist.)

2. Store your drums at the school.

Teaching by yourself is hard, and if you have to load in and out of the school every day, it’s close to impossible. If a school can’t provide you with secure storage for your equipment, don’t take the residency. It won’t be worth it.

3. Load in BEFORE your first day.

Your first day is hectic enough without also having to load in all of your equipment.

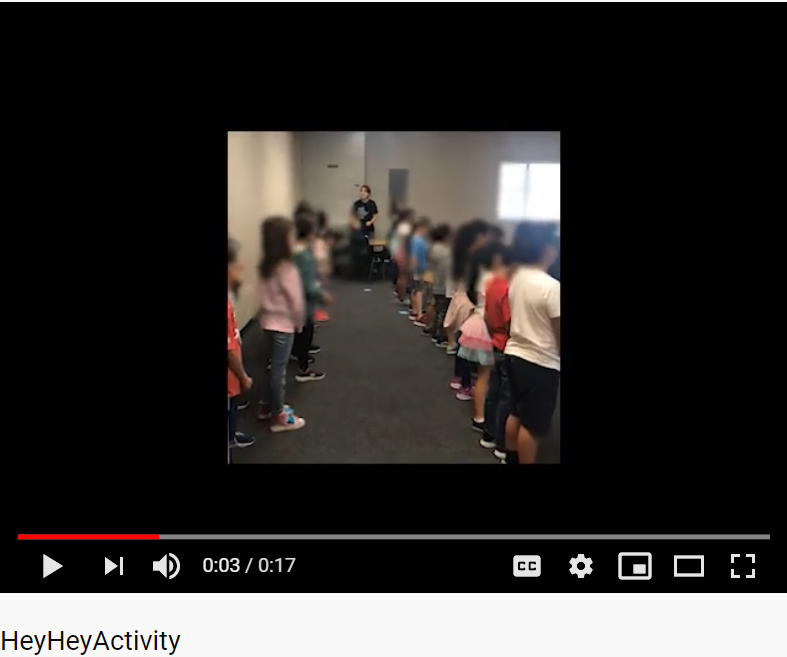
4. Set your class up in curved rows, not a circle.

If you’re in the middle of a circle, some students will always be facing your back. If you join the circle, kids at your 2 o’clock and 11 o’clock will have trouble seeing you. With curved rows, all students will have a good view of your face and will be better able to hear you.

5. Avoid residencies that are folded into after-school programs.

Taiko is fun! Taiko is loud! Taiko is exciting! The structure of the regular school day, along with good classroom management, can help even the most excited kids stay focused. After-school programs (aka after-care) are far less structured and it’s too hard to avoid chaos when teaching taiko in them. Do yourself a favor and don’t accept a residency if it’s incorporated into an after-school program. (But by all means, if you have your own studio and the students come to you, offer taiko classes after school. That’s a different thing all together.)

6. Have students help you clean up.

Students as young as 2nd grade can reliably handle the responsibility of packing drums and putting them back in their storage spot. Ask your last teacher of the day to leave you 5 kids to help pack up. They’ll LOVE doing it, and it will make your life easier.

7. Include classroom teachers.

Just like the Office Manager and Custodian, a classroom teacher who feels valued is a powerful ally. Their enthusiasm about your classes will shape the students’ enthusiasm. Email your lesson plans to classroom teachers in advance, give them the opportunity to participate, let them teach any arts integration you’re incorporating. Also be sure and send them your bio before you start so they understand that you’re a competent professional coming to enrich the education of their students.

8. Informance, not performance.

Schools are likely going to ask for a performance at the end of your residency. I always suggest having the last class be an informance instead and schools almost always go for it. For an informance, I invite the students’ families to come watch the last class. I guide the kids through the activities they’ve learned (which always includes at least one song) and pause regularly  to explain to the “audience” what skills the students just demonstrated.

Families LOVE this: they get to watch their student the whole time, rather than attending an evening performance where multiple classes perform. Teachers LOVE this: they don’t have to come back to school for an evening event after a long day. Kids LOVE this: it’s lower stakes than a performance, they still get to show off, and they’re in the spotlight the whole time. I LOVE this: it doesn’t add an additional event to my scope of work and I can focus the entire residency on skill building rather than creating a performance product.

9. Allow for mistakes (your and theirs).

Most students aren’t going to immediately succeed. Don’t get frustrated. Find different ways to practice skills and keep at it. They’ll learn. (This is why I have umpteen pulse activities.)

The same is true of you as a teacher. You’re not going to succeed all of the time. Some activities will fall flat. You’ll accidentally say “don” when you mean to say “su.” You’ll forget that the school changed your schedule one week and you won’t show up on time. I’ve done all of these things. It’s not awesome, but the more you can dust yourself off and try again the better your mental health will be. Bonus: if you can dust yourself off and try again in front of your students, you’re modeling for them a growth mindset, which is something kids need to see.

10. Get rest.

Teaching is exhausting. It makes you WAY more tired than just playing taiko. Get your rest and eat your Wheaties on teaching days. If you drink alcohol, don’t drink the night before a teaching day. Alcohol messes with your sleep and a restless night = a rough teaching day.

There you have it! The top 10 things I wish I’d known when I started teaching. I hope they’re helpful to you. Happy teaching!


Teaching K-3 students to solo

Creating patterns

Creating patterns

Soloing can intimidating. It’s a tough skill that draws on multiple competencies; acute awareness of the pulse, a large “beat vocabulary,” confidence, and more.

Soloing can be taught, but students get overwhelmed if you try to do it all at once. My method of introducing soloing to younger students breaks the skill into bite-sized pieces learned over several weeks. It’s one thing I do in class over those 4 weeks, rather than the only thing we work on. With students this age I let them create and play duets if they want, which is less high stakes and cultivates confidence.

Here’s my method:

Week 1

  1. Teach kuchishoka using the Squirrel Village story.

Fill the boxes with one kuchishoka each.

Fill the boxes with one kuchishoka each.

Week 2

  1. Remind students of the squirrel rhythm pattern from the story. Have them play it on their laps. Point out that the number of syllables they’re saying corresponds to what they’re playing.

  2. Draw a horizontal rectangle on the board. Divide it into 4 equal boxes.

  3. Choose 4 kids. Have each say don or doko. Write the words they say on the board, one per box.

  4. Lead the class through clapping the pattern their classmates created.

  5. Have students move to drums.

  6. Lead students in playing the pattern on the drums.

  7. Repeat steps 3, 4, and 6 two or three times.

  8. Introduce su. (It’s in the squirrel rhythm, but they won’t have realized it.)

  9. Repeat steps 3, 4, and 6 several more times, adding su into the mix.

Week 3
(Ask teachers to bring individual whiteboards, markers, and erasers to class.)

  1. Do steps 3, 4, and 6 from last week to activate their prior learning.

  2. Give 2-3 minutes for students to create a 4-beat rhythm pattern on their own whiteboard, drawing boxes and writing words inside them (the way they’ve been doing it as a class). Allow them to work in pairs with their drum partner or own their own.

  3. Have students say and clap their individual patterns all at the same time.

  4. Have students play their individual patterns on the drums all at the same time.

  5. Have students leave their whiteboards and rotate to a new drum.

  6. Repeat steps 4 and 5 at the new drum.

  7. Rotate and repeat for up to 20 minutes.

Week 4
(Ask teachers to bring whiteboards again.)

  1. Have students make up their own patterns individually or in pairs.

  2. Have students play their patterns all together.

  3. Have students play patterns one at a time. You need to conduct this. I count in the whole group, then make friendly eye contact with a student when it’s their turn to play and mark their 4-beats with my hand. The first time around is rocky, but the second time goes fine.

At the end of Week 4, each kid or pair has a short solo ready to plug into a song. Have them play it twice if you need a longer one. Be sure to email your classroom teachers before Weeks 3 and 4 to ask them to bring their individual whiteboards to class (I have yet to run into a class that doesn’t have a set).

If you try this approach, let me know! I’d love to hear how it goes. Happy teaching!